5 | JOYFUL DETAILS
In this lesson, is a playful and decorative idea, crafting a simple tag page designed to be bound right into your album. You’ll create a paper hinge to attach the tag, then add a small pocket to the front as the foundation for your festive cluster. Using frames, tickets, sentiments, and botanical die cuts, we’ll build a layered embellishment that feels both joyful and artful. This is a project meant to repeat — a design you can revisit throughout December whenever you want to pause, play, and add a touch of handmade charm to your story album.
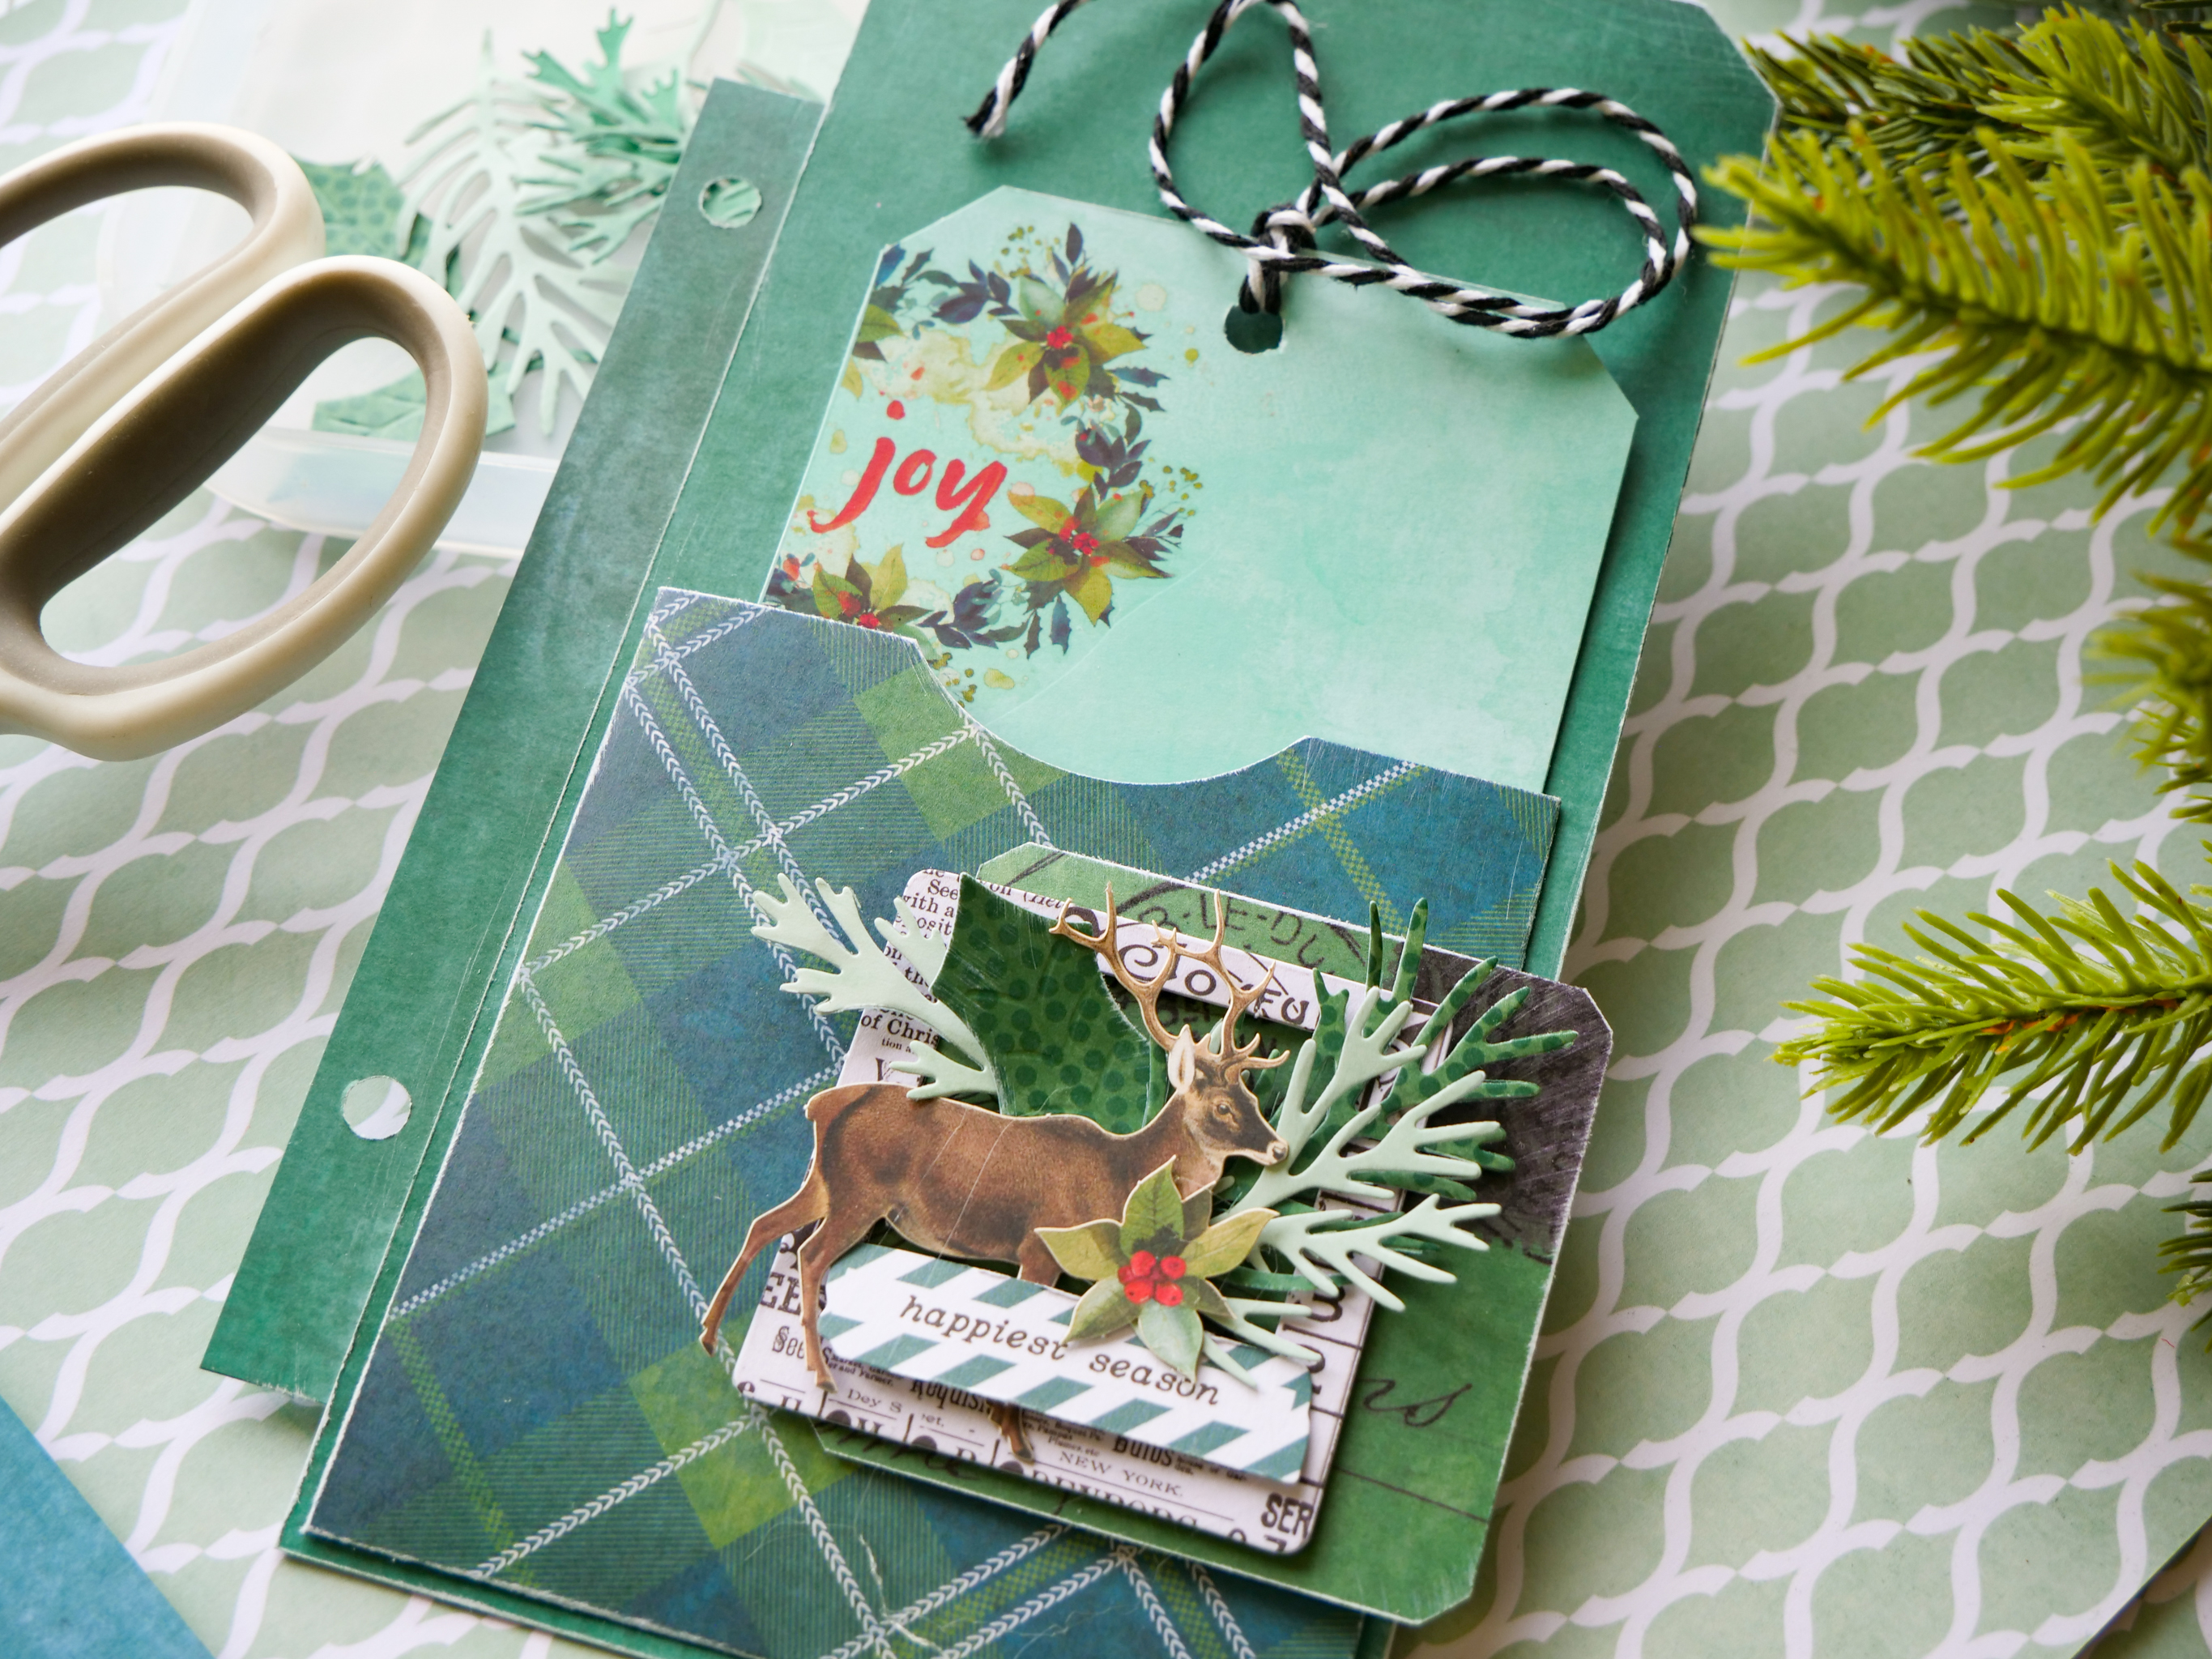
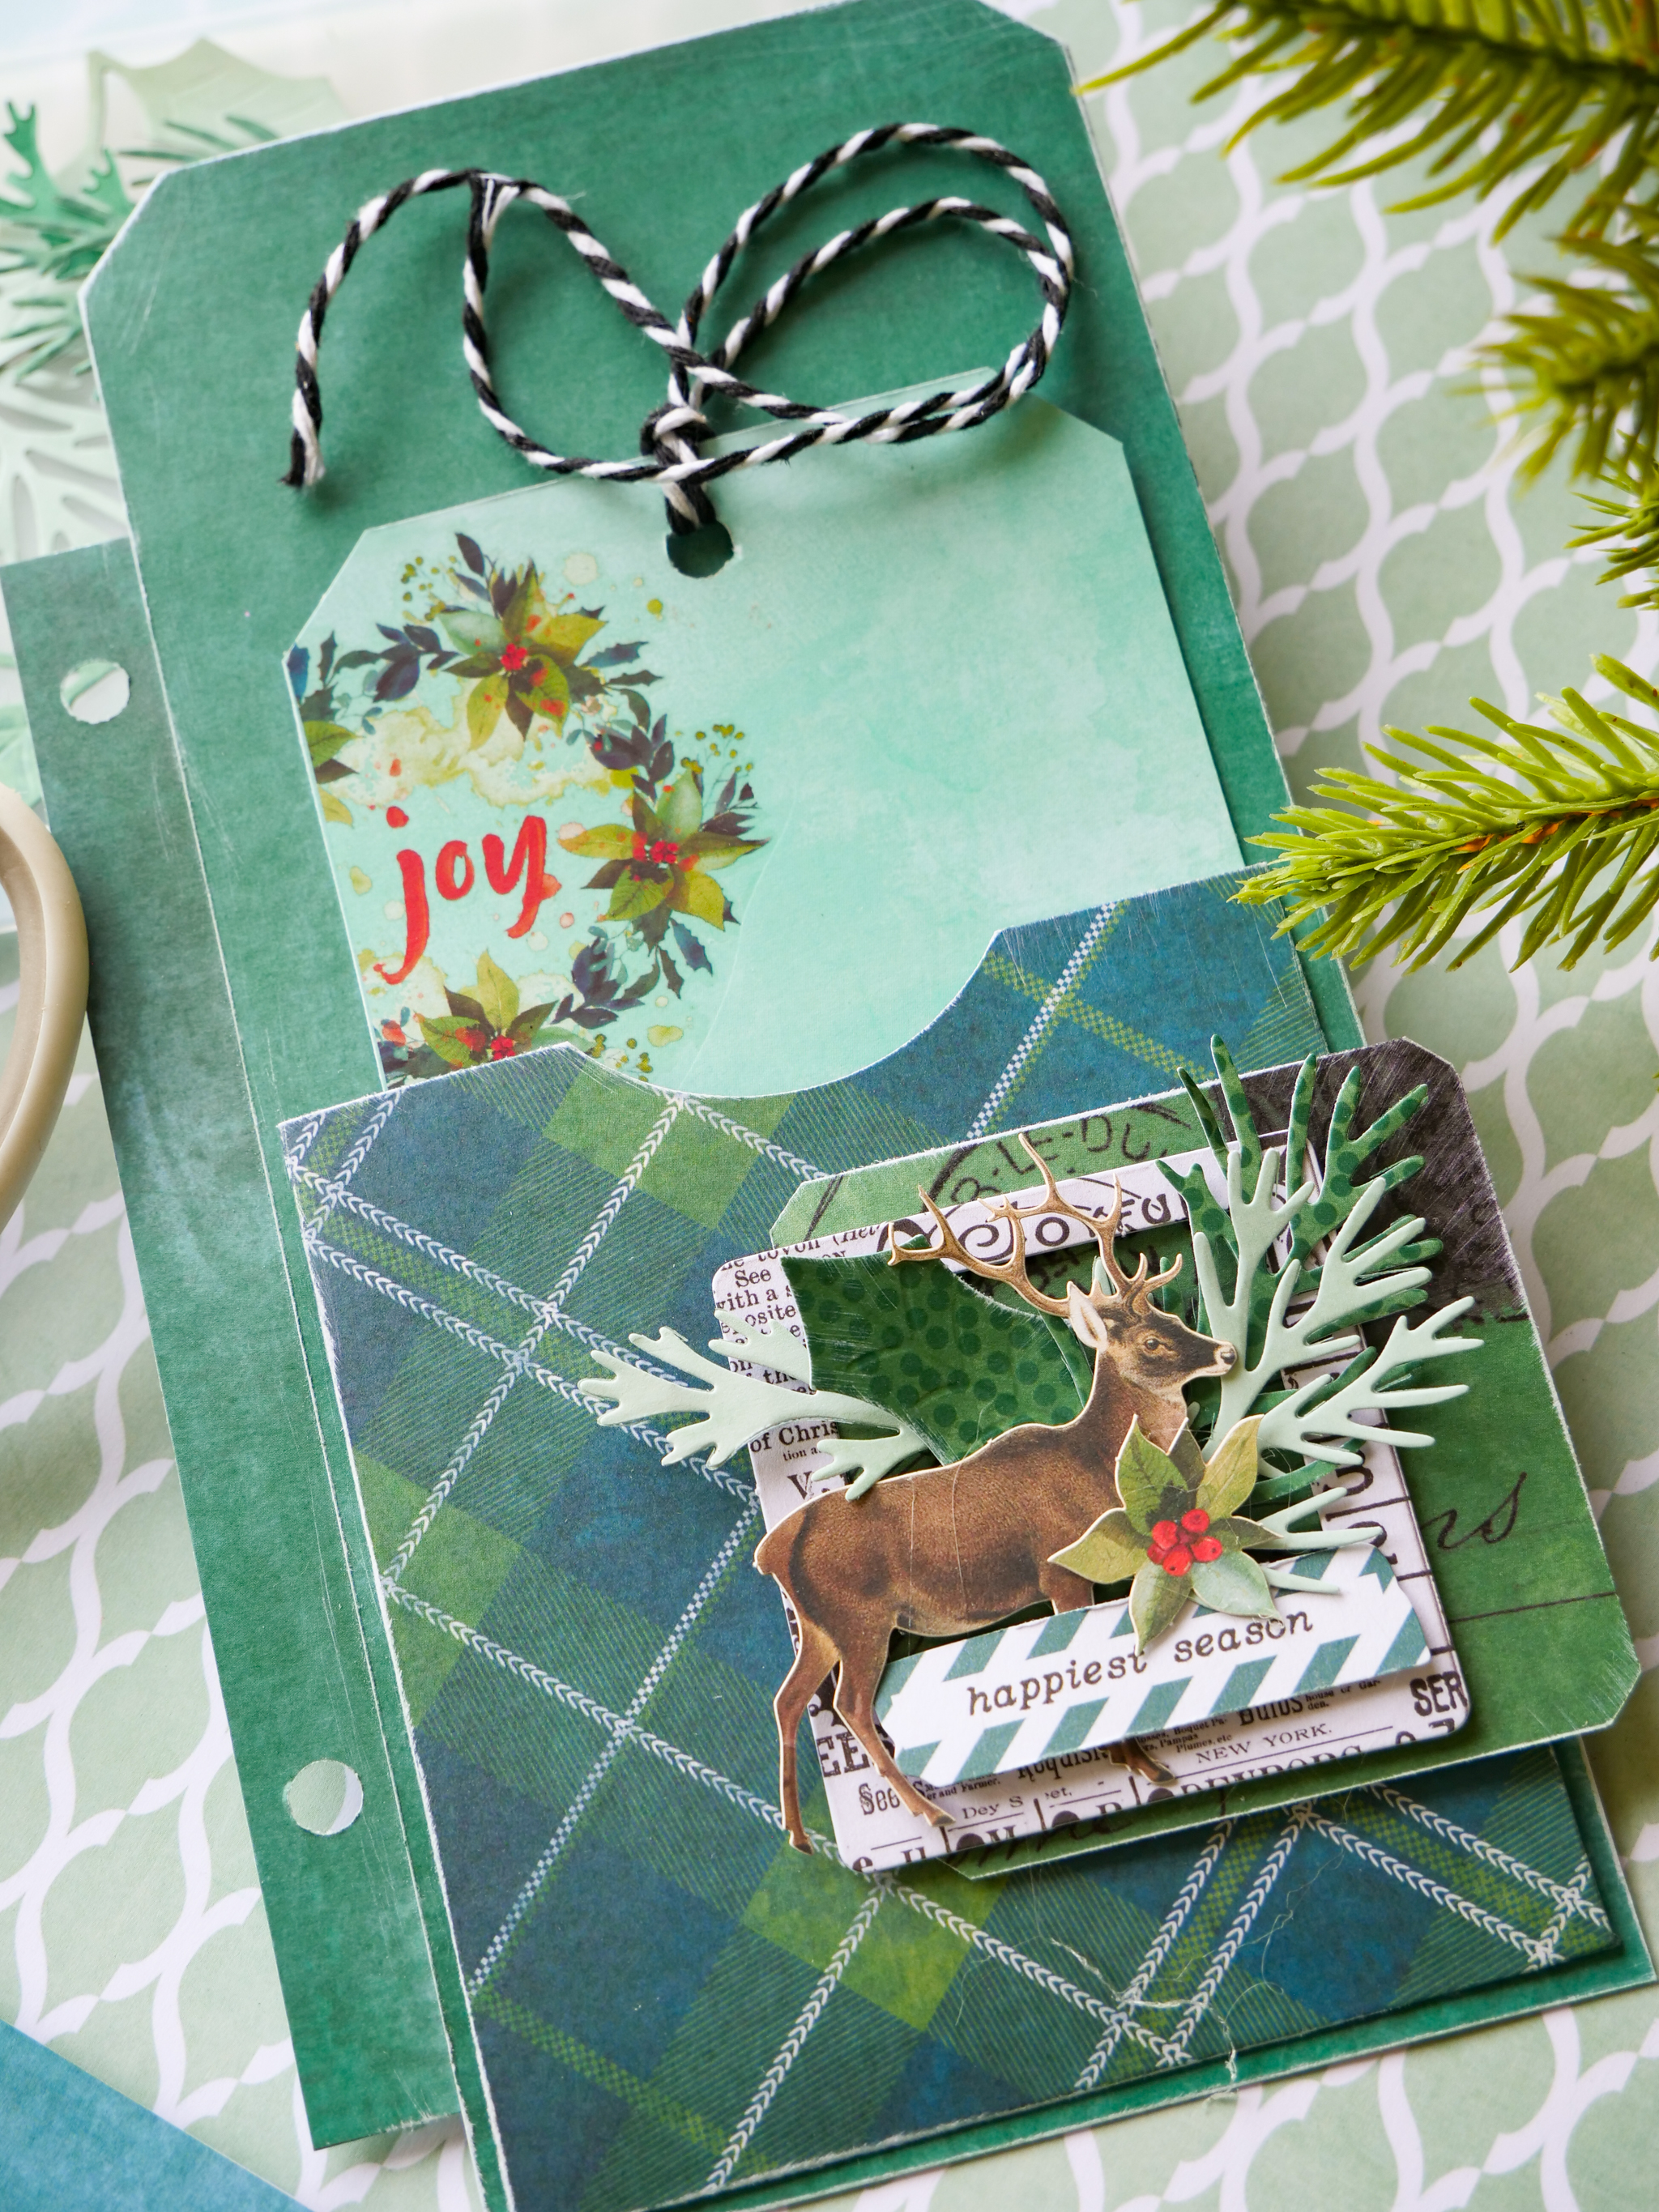
Choose pattern paper for the front of the tag as well as the back.
Create tag by trimming papers to 4x8. Miter the corners.
Using the same paper as the front tag, cut another piece to be 6x1.
Adhere the front of the tag and the back of the tag together with the ‘hinge’ suspending between on the left hand side centered.
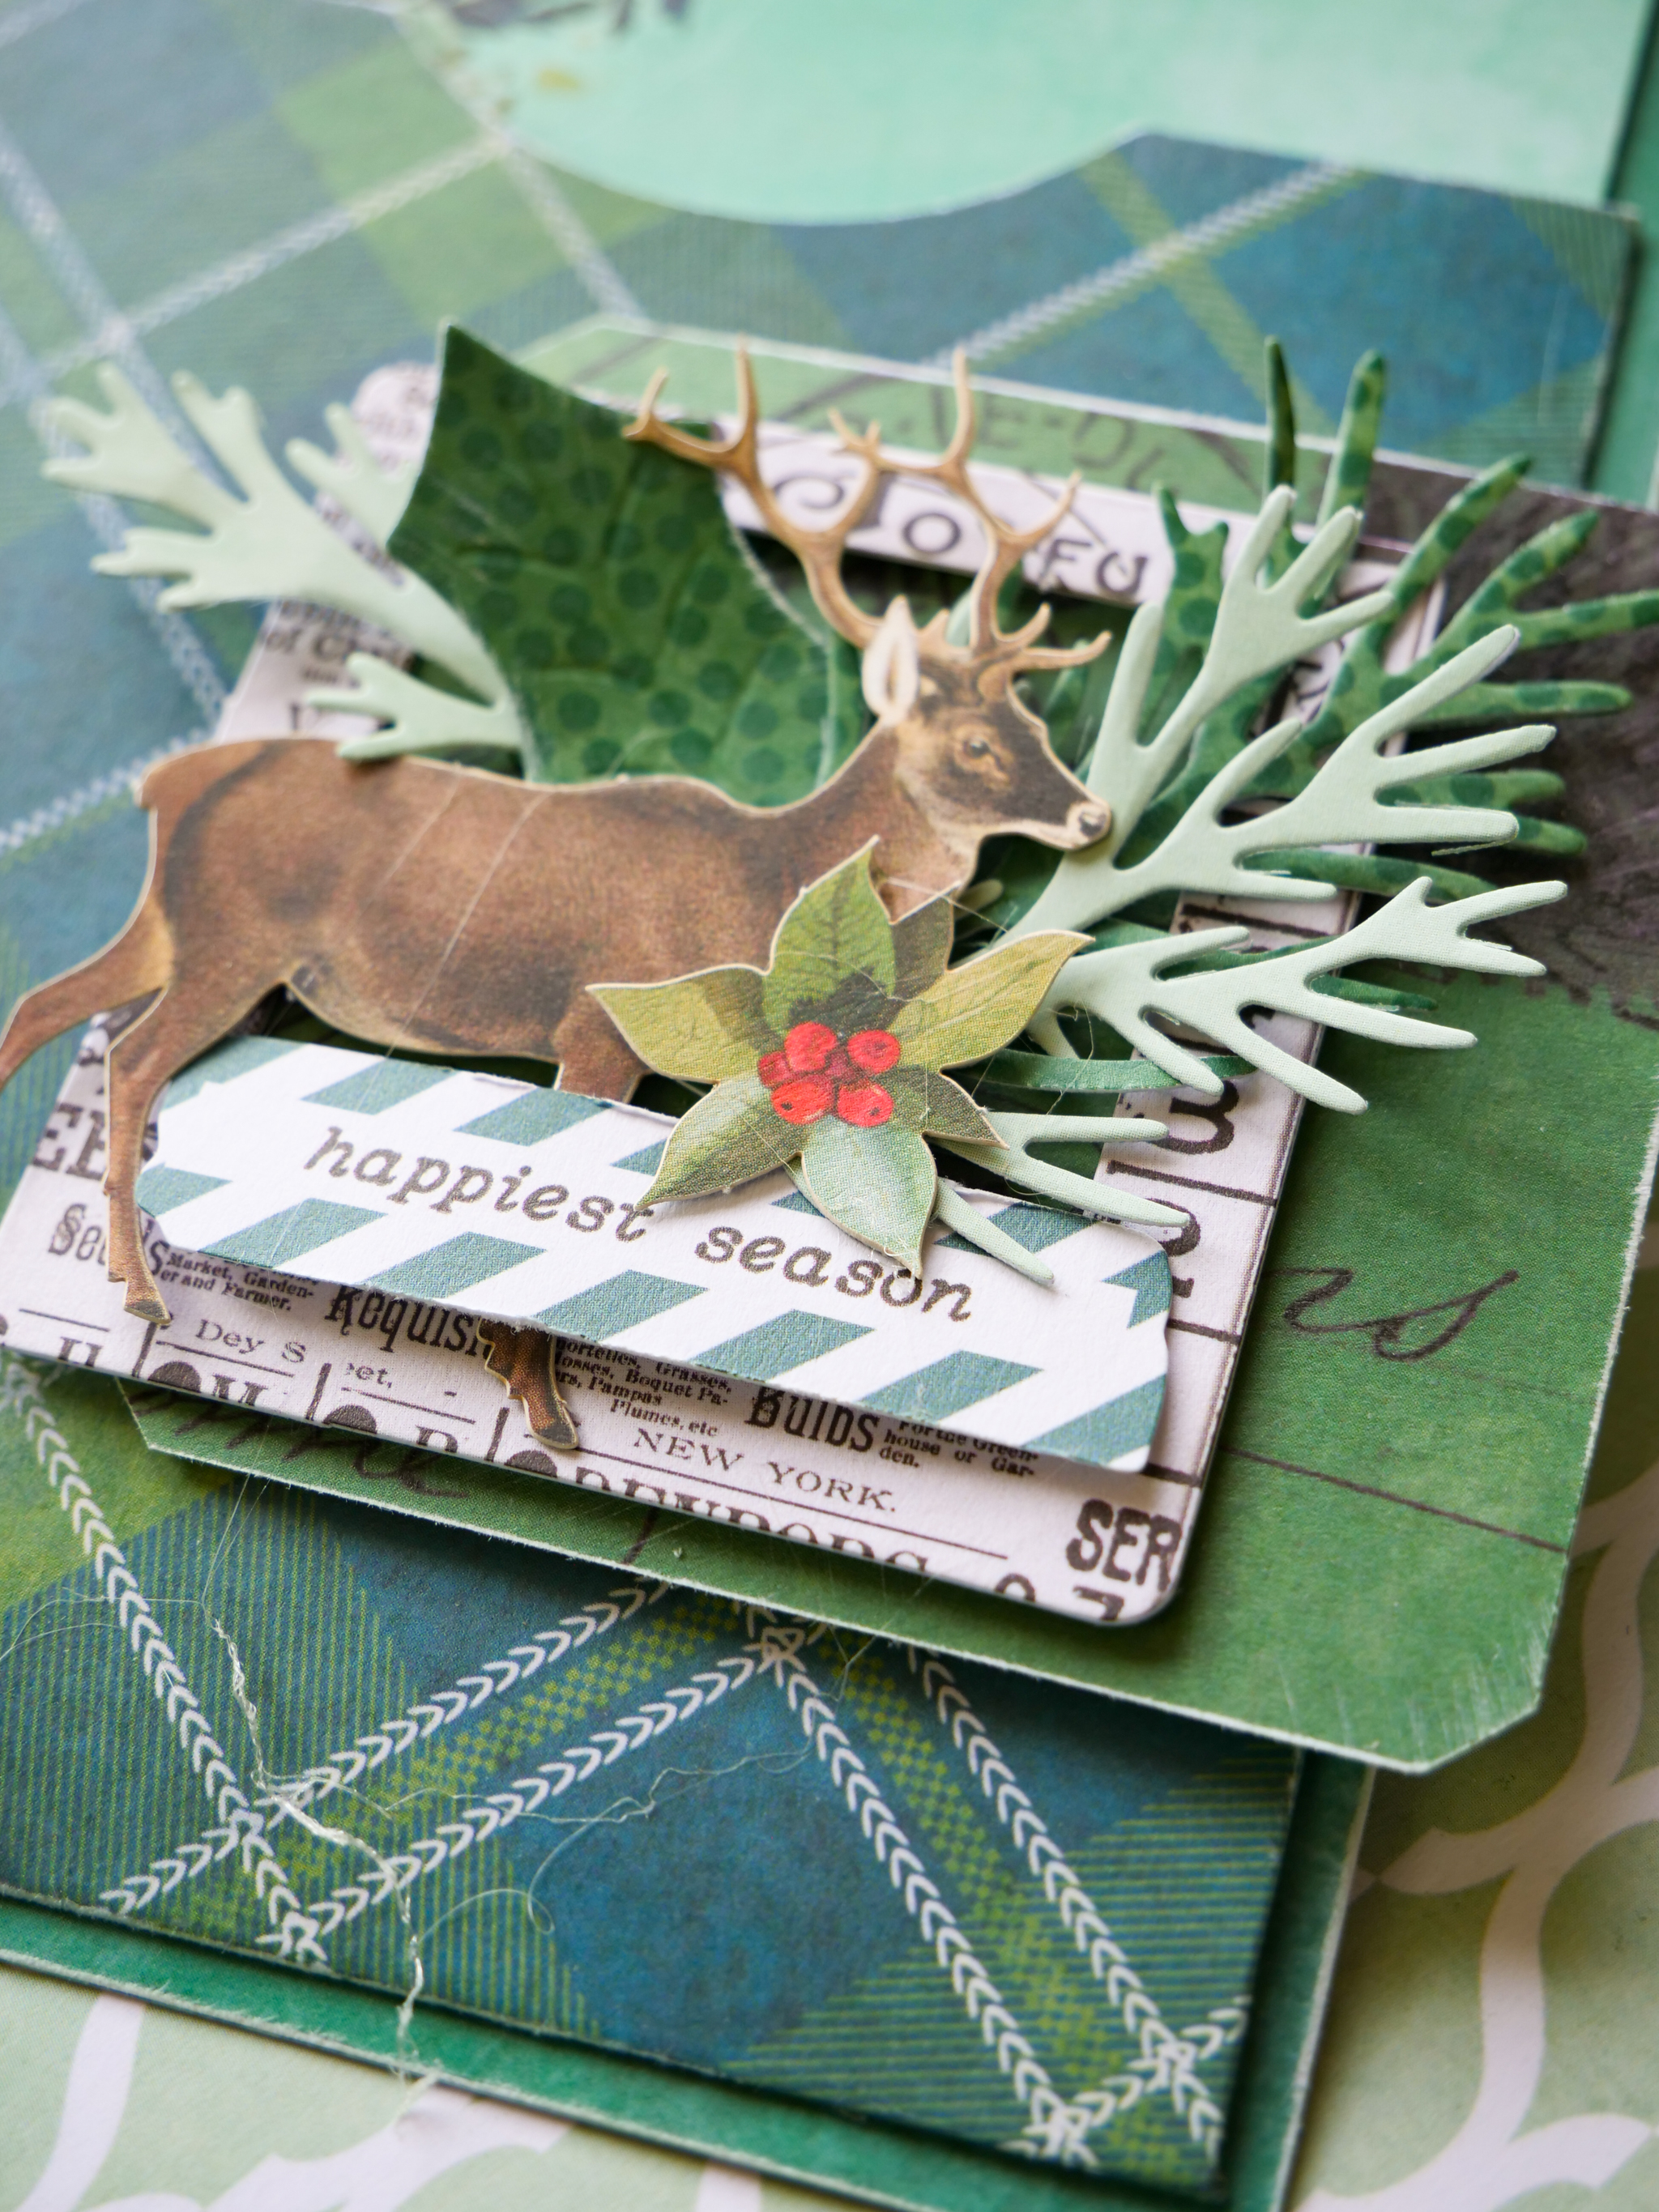
Craft a pocket by trimming paper to 4 ¾ wide and 4 ½ tall.
Score three sides ½ inch to form a pocket. Take a small circle bite out of the top. Adhere flaps to bottom edge of front of tag.
Craft another tag to be 3 ¼ x 6. Punch hole at top. Transfer rub on. Add trim and some hanging down elements.
With scrap paper (a 2 ½ x 2 ½ trimmed pattern paper) ,frame, ticket,
die cuts and sentiment, creating a festive embellished cluster to the front of the pocket.
Save the back for a photo or embellish or use for journaling.